How do I find my DxDiag file?
Please use the steps below to find information about your current installation of DirectX:
- Press the [Windows]+[R] keys on your keyboard to bring up the Run command.
- In the "Run" command box, type in "DxDiag" and Press [Enter]. This will start the DxDiag utility.

- Once the Direct X Diagnostic Tool appears, click on the Save All Information button at the bottom.
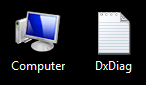
- When asked to where to save the file to, select Desktop.
- The "DxDiag" filename should appear in the file name box. Leave this as is and click on the Save or OK button.
- Click the Exit button to exit the Direct X Diagnostic Tool.
- On the Desktop, there should now be a file name DxDiag or DxDiag.txt.
Note: If there is no file with this name, please repeat the steps above ensure the file is saved to the Desktop.
To attach the file to a Customer Support help request:
- Go to https://help.bethesda.net/ and log into the website
- Once logged in, select the Product that you have an inquiry about and navigate through your choices.
- On the final page, you will fill out your information and select "Attach File"
- Browse for the newly created DxDiag file on the Desktop.
- Double-click the file to attach it.
- Fill out the rest of the submission form and click the "Next" button to submit.
If you have already submitted a ticket and need to attach it, log into the Bethesda.net website and choose "My Support." From here, you can select your ticket and attach your document under "Update this ticket."