In Ubuntu Operating System, taking a screenshot is really easy. You can make use of the ‘Print Screen’ button in your keyboard or the inbuilt screenshot tool. But, what if you need to take the screenshots automatically or in a regular interval? You can’t use the above methods. Don’t get disappointed. We have another handy utility in Ubuntu to fit this job, SCROT!
SCROT (SCReenshOT) is a powerful command line screen capturing, open source utility to take the screenshots of a specific window or terminals using Cron jobs. The screenshots can be taken manually or automatically using SCROT. It offers flexibility by allowing the user to specify the parameters in the command line. The screenshots are captured and saved using the ‘imlib2‘ library and it supports the formats like .png, .jpg, .jpeg, .gif etc.
Install SCROT in Ubuntu:
SCROT is present in the Ubuntu repository, so to install it use the terminal or the Ubuntu software center.For installing SCORT using terminal,
Open the terminal (Alt+Ctrl+T)
Type the command to install SCROT in your system
sudo apt-get install scrot
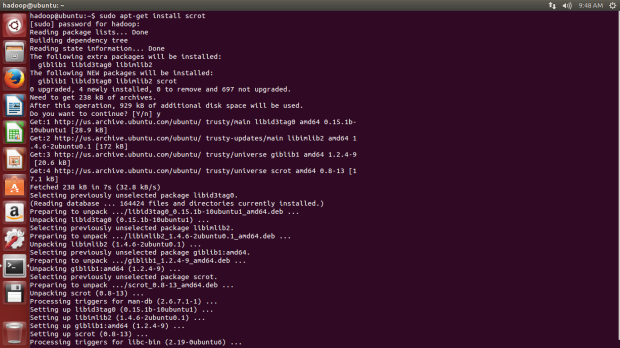
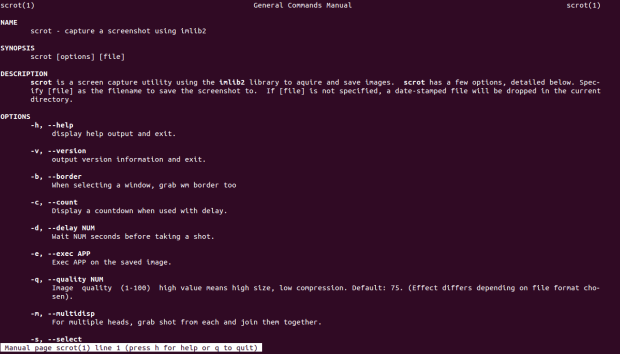
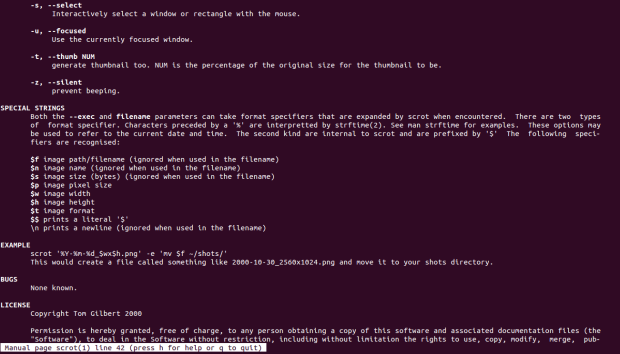
Now the SCROT utility is installed in your system. Using the MAN pages, you will get the possible options as shown below
Taking screenshots manually using SCROT:
To take the screenshot of the current desktop and save it in a specific folder say Pictures,
scrot ~/Pictures/Desktop.jpg
To take the screenshot of a specific area on the desktop,
scrot -s ~/Pictures/Window.jpg
Note: You have to select the area in the screen using the cursor to take the screenshot.
Taking screenshots automatically using SCROT:
The syntax for automatically capturing the screenshots at regular interval:
while true; do scrot -d int ‘filename.jpg|png’ -e ‘mv $f /file/path/to/store/screenshots’; done
Where the int gives the time delay between each screenshot.
filename and file extension (.jpg or .png) can be given according to the user preference.
The day, month, year, hour, minute, second can also be specified along with the filename as %d-%m-%Y-%H:%M:%S respectively.
For example if you want to capture the screenshots in every 5sec interval, then you need to modify the above syntax as shown below,
while true; do scrot -d 5 ‘DEMO%d-%m-%Y-%H:%M:%S.png’ -e ‘mv $f ~/Pictures/’; done
Note: To stop the capturing of the screenshots, press Ctrl+Z.
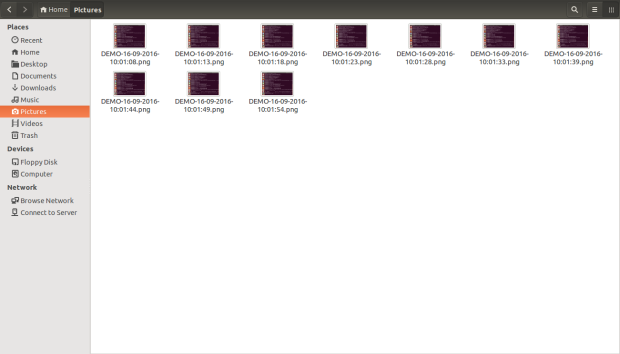
To keep a count of the screenshots instead of running continually, you can use the below command,
for i in {1..10}; do scrot -d 5 ‘DEMO%d-%m-%Y-%H:%M:%S.png’ -e ‘mv $f ~/Pictures/’; done
This will give the following result in the pictures folder
Taking screenshots using Shell Script:
For easy usage you can use a shell script,
Open gedit by typing the following in the terminal,
sudo gedit
Now paste the below text in the editor,
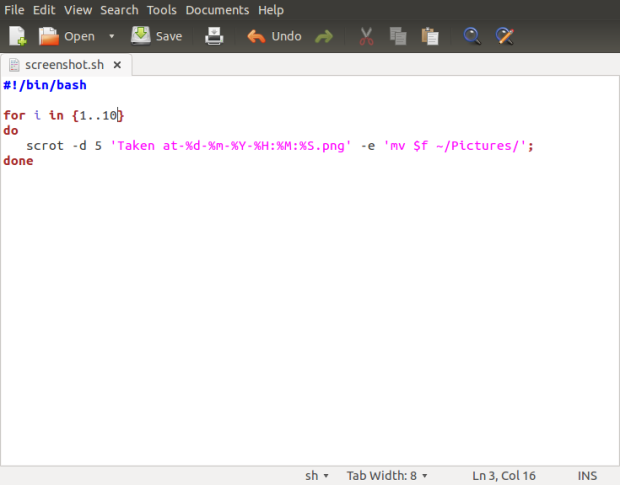
#!/bin/bash
for i in {1..10}
do
scrot -d 5 ‘Taken_on-%d-%m-%Y-%H:%M:%S.png’ -e ‘mv $f ~/Pictures/’;
done
Save the file with a filename say screenshot and extension as .sh
Now you have to grand executable permission to the script by using the following command in the terminal,
sudo chmod +x ~/screenshot.sh
To run the script,
./screenshot.sh
SCROT is a useful and handy utility. Try it out!
